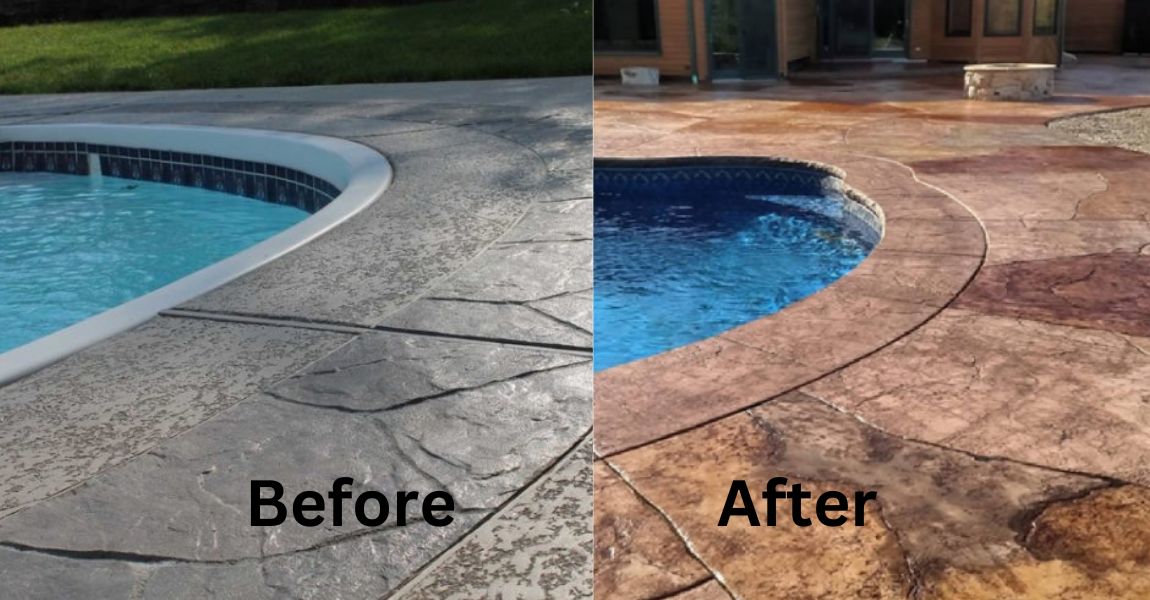
Painting a Concrete Pool Deck not only gives a useful surface around your pool but also fills in as a vital component in characterizing the general feel of your outside space. Over the long term, the ability to interact with the elements can cause substantial wear and lose its visual appeal.
Painting concrete pool deck is a practical and stylishly satisfying way of renewing its appearance while adding a layer of insurance against the components. In this practical guide, we’ll walk you through the bit-by-bit course of painting a substantial pool deck to guarantee a fruitful and solid outcome.
Materials and Tools:
- Concrete cleaner or degreaser
- Pressure washer
- Patching compound (if needed)
- Concrete primer
- Concrete paint or stain
- Paint roller or sprayer
- Paintbrush (for edges and corners)
- Painter’s tape
- Drop cloths or plastic sheeting
- Stir sticks and paint tray
Steps For Painting A Concrete Pool Deck
Here is a list of steps that will help you in the process of Painting A Concrete Pool Deck. Let’s review each step and make your pool stylish
Step 1: Preparation is Key
Before jumping into Painting a Concrete Pool Deck, thorough preparation is essential to accomplish a dependable and outwardly satisfying finish. Start by cleaning the entire surface to eliminate soil, oil, and some other impurities.
Use a high-quality detergent or degreaser, applying it as indicated by the producer’s guidelines. This step guarantees that the paint sticks appropriately and gives a smooth, even finish.
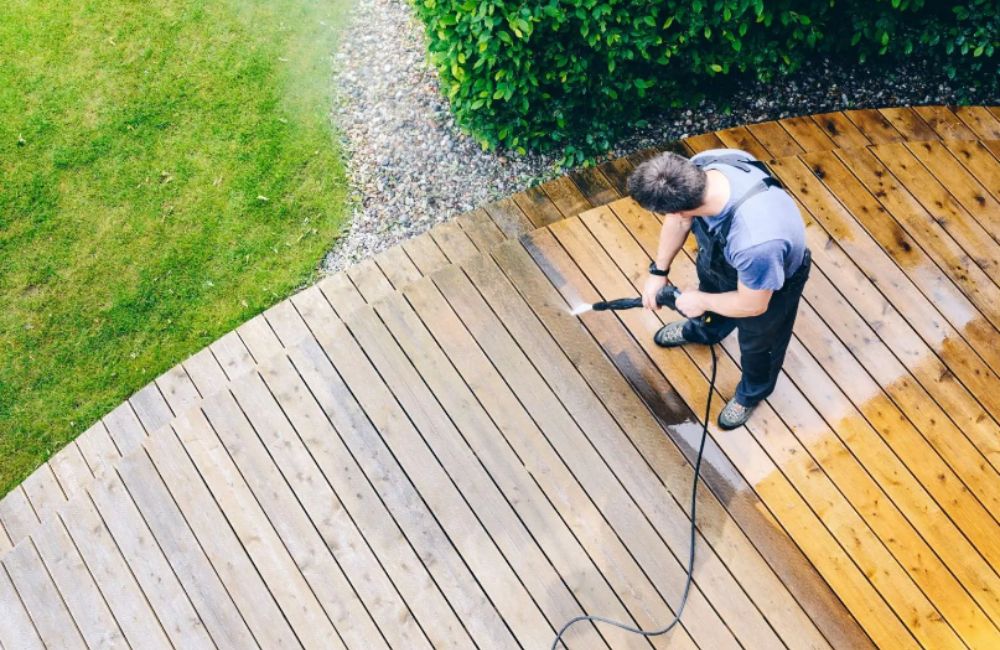
Follow up the cleaning system with an exhaustive strain wash. A strain washer helps eliminate any leftover cleaner, as well as soil and grime that might be profoundly implanted in the substantial. Allow the surface to dry before continuing toward the following stages.
Step 2: Inspection and Repair

While moving forward for Painting a Concrete Pool Deck, a careful examination is the first step toward an effective pool painting project. Cautiously inspect the surface for any breaks, flaws, or imperfections that could think twice about the use of paint. These issues, whenever left unattended, can prompt an unsymmetrical finish and diminished strength.
If you uncover any defects, you can relax, the cure lies in a reasonable fixing compound. This flexible material makes all the difference in filling breaks and making a level surface. Apply the fixing compound as indicated by the producer’s guidelines, guaranteeing that it sufficiently resolves the distinguished issues.
Permit adequate time for the fixed regions to dry before continuing to the subsequent stages, ensuring a strong and even material for your paint application.
Step 3: Primer Application
Priming is a pivotal stage in the painting process, serving as the bedrock for enhanced adhesion and durability of the paint. Your choice of a high-quality concrete primer is paramount. This preliminary layer works with better paint adherence as well as adds to the general lifespan of the completion.
Apply the flooring evenly across the whole pool deck surface, taking into consideration closely adhering to the maker’s directions. The application strategy and drying times provided by the maker of the material are essential to guarantee ideal outcomes. This foundational step sets the stage for a successful and enduring paint job that will withstand the challenges posed by weather and pool activities.
Step 4: Masking and Protecting
Accuracy is key to accomplishing spotless and distinct lines in your paintwork. If you want to leave some pool area unpainted then use painter tape for protection. This guarantees that the edges, pool borders, or neighboring finishing highlights stay flawless through paint.
As well as utilizing painter’s tape, take the additional proportion of safeguarding the actual pool. Cover it with drop fabrics or plastic sheeting to protect it from possible splatters or trickles during the chemical reaction. This double way to deal with covering and safeguarding ensures a clean and professional appearance while saving the flawless state of your pool.
Step 5: Painting a Concrete Pool Deck

With the surface meticulously prepared and shielded, it’s time to bring your vision to life through the application of concrete paint. Before commencing, give the paint a thorough stir for the best paint for pool deck. Depending on your preference and the scale of the deck, you can opt for a paint roller for broad strokes or a paint sprayer for a more efficient application.
Apply the paint evenly across the entire pool deck, adopting a systematic approach to avoid missing any areas. This phase is where your creativity can shine, transforming the once-dull concrete into a vibrant and visually appealing space that complements your outdoor oasis.
Step 6: Second Coat
After allowing the initial coat to dry completely, it’s time to evaluate the coverage. Some concrete paints may benefit from a second coat to achieve optimal results in terms of appearance and durability. Follow the manufacturer’s guidelines on drying times between coats, ensuring that each layer contributes to enhanced coverage and resilience against wear.
Applying a second coat is not just a cosmetic touch; it reinforces the protective layer, fortifying your pool deck against the elements and the foot traffic associated with poolside activities. This additional layer is an investment in the longevity and overall quality of your painted surface.
Step 7: Detail Work
For a genuinely proficient completion, diligence is principal. This is where a top-notch paintbrush becomes possibly the most important factor. Use it for accuracy work, like composition edges, corners, and any complicated regions that might have been missed by the roller or sprayer.
Detail work guarantees that everywhere gets satisfactory consideration, bringing about a consistent and clear-cut last launch. This careful methodology ensures a strong and clean finish that lifts the general tastefulness of your substantial pool deck.
Step 8: Drying Time
In the realm of painting, tolerance is to be sure of goodness. Allow the last coat to dry before moving on to the subsequent stages. Drying times can fluctuate given the kind of paint utilized and ecological circumstances, so it’s critical to stick to the suggested drying times given by the paint maker.
During this holding-up period, fight the temptation to rush the process. The compensation for your understanding will be a completely relieved and tough surface that can endure the challenges of poolside exercises and changing weather patterns.
Step 9: Sealing

While not compulsory, applying a concrete sealer is an extra measure to improve the sturdiness and life span after Painting a Concrete Pool Deck. A sealer goes about as an additional layer of insurance, preparing for UV beams, water openness, and general mileage.
If you decide to apply a sealer, follow the maker’s suggestions regarding application procedures and drying times. This optional step can contribute essentially to the life expectancy of your paintwork, giving an additional safeguard against the components and saving the dynamic quality of the varieties.
Step 10: Clean Up
As the last strokes of your creative project go according to plan, don’t neglect the significance of proper cleanup. Take care of your devices determinedly, guaranteeing they are free of leftover paint or cleaning materials. Discard any loss as per nearby guidelines, exhibiting a guarantee to natural obligation.
By embracing careful tidy-up sessions, you set up your devices for later use as well as adding to limiting the natural effect of your project. An honest way to deal with tidy-up is the final detail that supplements your wonderfully painted concrete pool deck.
Wrapping It All Up!!!

Painting a Concrete Pool Deck is an extraordinary task that requires cautious preparation, fast execution, and a hint of imagination. Each move toward the process plays a significant part in accomplishing a sturdy, outwardly engaging completion that upgrades your open-air living space.
By putting time and exertion into the planning, preparing, veiling, and painting stages, you’ll make a pool deck that endures everyday hardship as well as turns into a point of convergence of unwinding and satisfaction in your home.
Explore our website, Finestyler, for valuable guides on men’s and women’s hairstyles, home decor, beauty, and fashion.
Read more.